Halloween pumpkin painting should be fun, easy, and something anyone can do at home. You don’t need professional painting skills, expensive supplies, or complicated designs to make your pumpkins look amazing.
With a few bottles of acrylic paint, simple brushes, and a little creativity, you can turn ordinary pumpkins into funny monsters, spooky ghosts, silly vampires, cute witches, and colorful Halloween characters.
The best Halloween pumpkin painting ideas are easy enough for beginners but still look beautiful when displayed on your porch, fireplace mantel, entryway table, or Halloween party setup.
These 12 DIY painted pumpkin ideas use simple shapes, bold colors, cartoon faces, and easy painting techniques. Each design is different, and every pumpkin can be recreated using basic craft supplies.
Whether you’re painting pumpkins with kids, decorating for a Halloween party, or making your front porch look spooky, these ideas will help you create something fun and memorable.
1. Funny Ghost Pumpkin With Big Googly Eyes
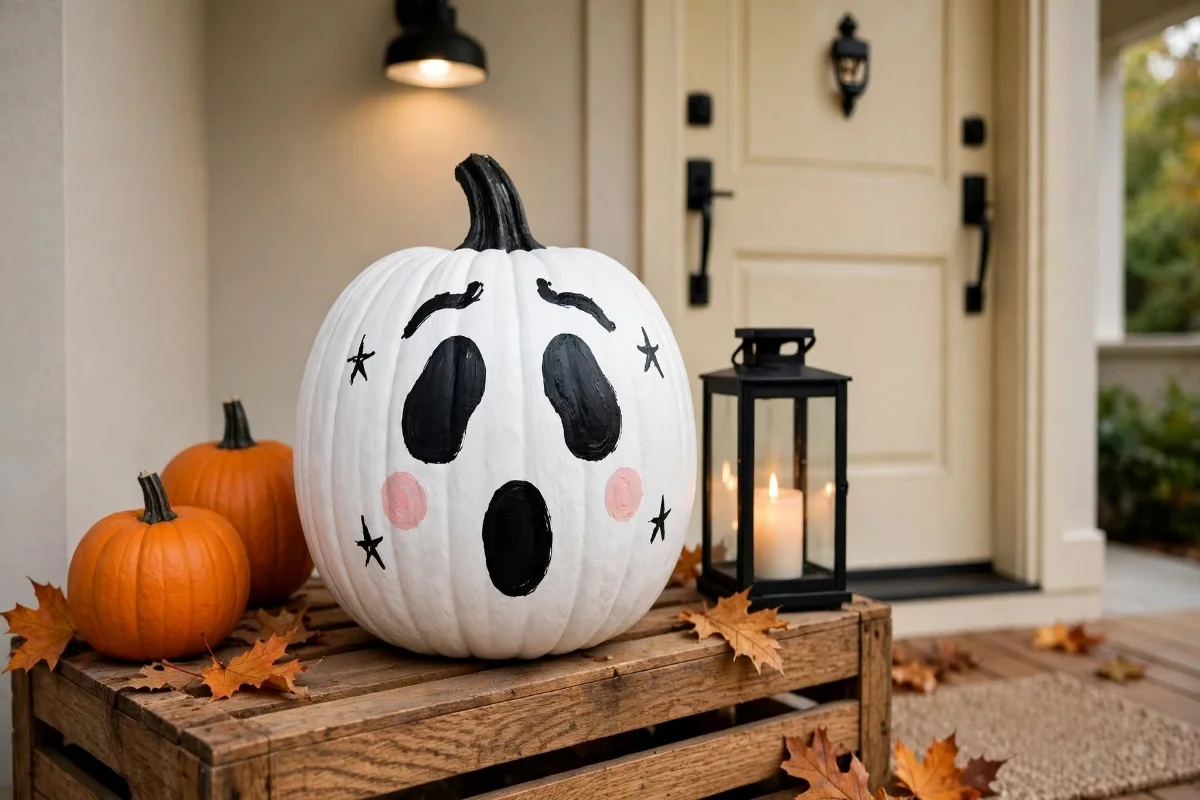
Turn an ordinary pumpkin into an adorable Halloween ghost with a funny expression. Paint the entire pumpkin bright white, then give it two oversized black oval eyes, raised eyebrows, and a big surprised mouth. Add tiny pink cheeks and a few small black stars around the face for extra personality. Paint the stem black and place the finished pumpkin on your front porch beside smaller orange pumpkins, a black lantern, and a cozy Halloween doormat.
Start by applying two thin coats of white acrylic paint and letting them dry. Use a pencil to draw two large eyes and a funny mouth, then fill them with black paint. Add pink cheeks using a small round brush or a cotton swab. You can make the expression surprised, sleepy, or silly by changing the eyebrows and mouth. This beginner-friendly design needs only white, black, and pink paint.
2. Silly Green Frankenstein Pumpkin With a Stitched Smile
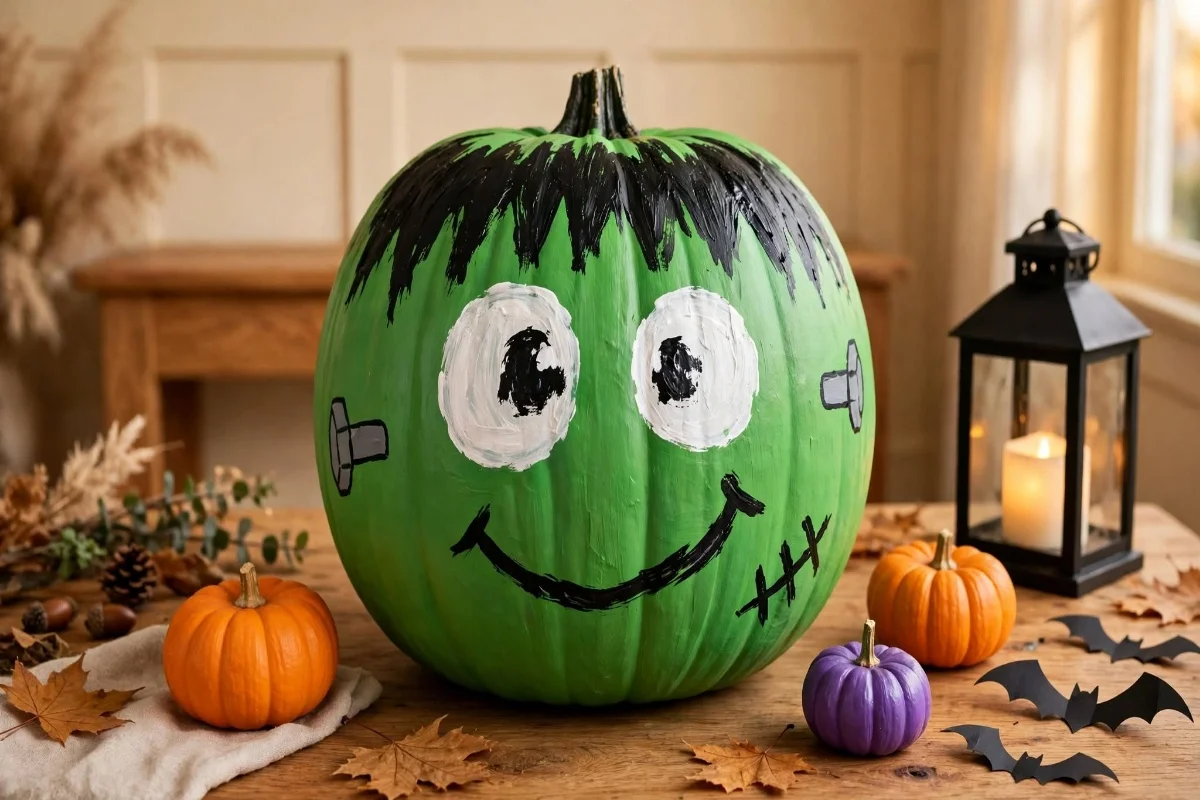
A funny Frankenstein pumpkin is perfect for a playful Halloween display. Paint a medium pumpkin bright monster green and add messy black hair across the top. Give it two large white eyes with uneven black pupils, a crooked smile, and simple black stitches on the cheeks. Paint two small gray bolt shapes on the sides to complete the cartoon monster look. Display it with purple and orange pumpkins, tiny LED lanterns, and a few decorative black bats.
Paint the pumpkin green and allow the surface to dry. Use a flat brush to create zigzag black hair just below the stem. Paint two white circles for eyes, add black dots, and draw a large crooked mouth. Finish with short black lines and little cross marks for stitches. You don’t need perfect lines because the uneven shapes make Frankenstein look even funnier. Use gray paint for the bolt shapes instead of attaching real hardware.
3. Cute Black Cat Pumpkin With Big Yellow Eyes
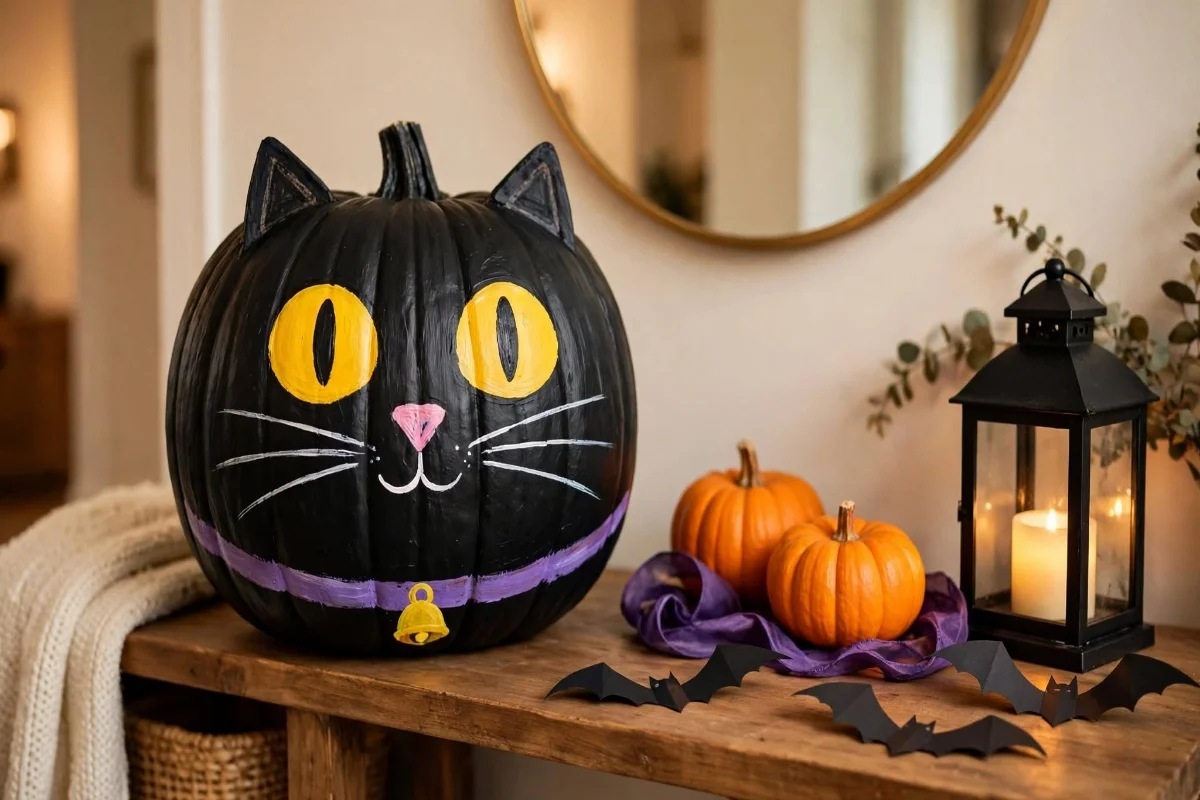
Create a spooky but adorable black cat pumpkin using simple painted shapes. Cover the pumpkin with matte black paint, then add two large yellow eyes with narrow black pupils, a tiny pink triangle nose, and long white whiskers. Paint two pointed ears near the top of the pumpkin to complete the cat’s face. Add a small purple collar with a painted gold bell near the bottom. Display the pumpkin beside orange mini pumpkins, a purple Halloween ribbon, and warm battery-operated candles.
Apply two coats of black paint and let them dry completely. Use a pencil to outline the eyes, nose, and ears before painting. Make the eyes large so the cat’s expression stands out from a distance. Use a white paint pen for the whiskers and a small brush for the pink nose. For the easiest version, paint the ears directly onto the pumpkin instead of cutting or attaching anything.
4. Scary Cartoon Vampire Pumpkin With Funny Fangs
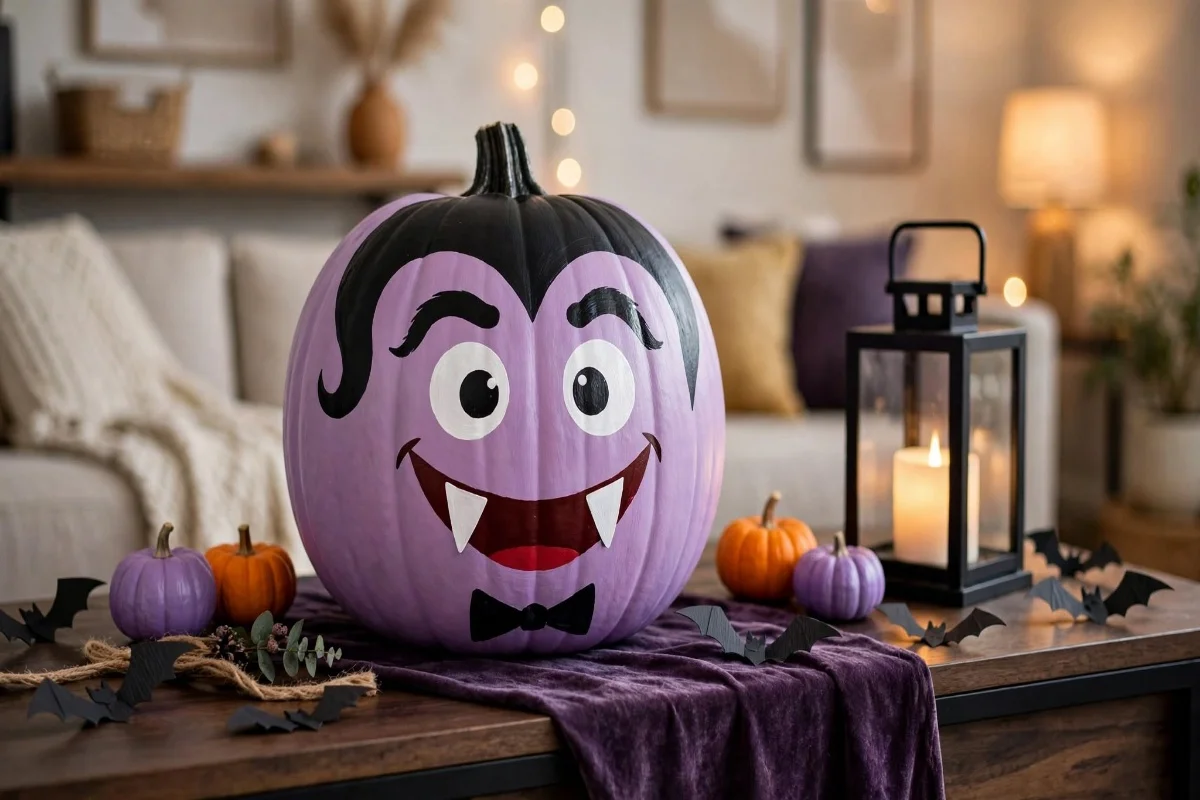
A cartoon vampire pumpkin is a great way to make Halloween decorations spooky without making them too frightening. Paint the pumpkin pale lavender or light purple, then add a large black hairstyle with a pointed widow’s peak. Give the vampire two wide white eyes, arched eyebrows, and a big smiling red mouth with two sharp white fangs. Add tiny red cheek marks and a black bow tie near the bottom. Display it with black lanterns, purple fairy lights, and small Halloween bats.
Start with a lavender base coat. Once dry, paint the black hair and eyebrows using a medium brush. Draw a large smiling mouth, fill it with dark red paint, and add two white triangle fangs. Finish with white eyes and black pupils. Keep the facial features oversized and simple so they’re easy to paint. A black paint pen can help create clean outlines without requiring advanced brush skills.
5. Goofy Mummy Pumpkin With Big Cartoon Eyes
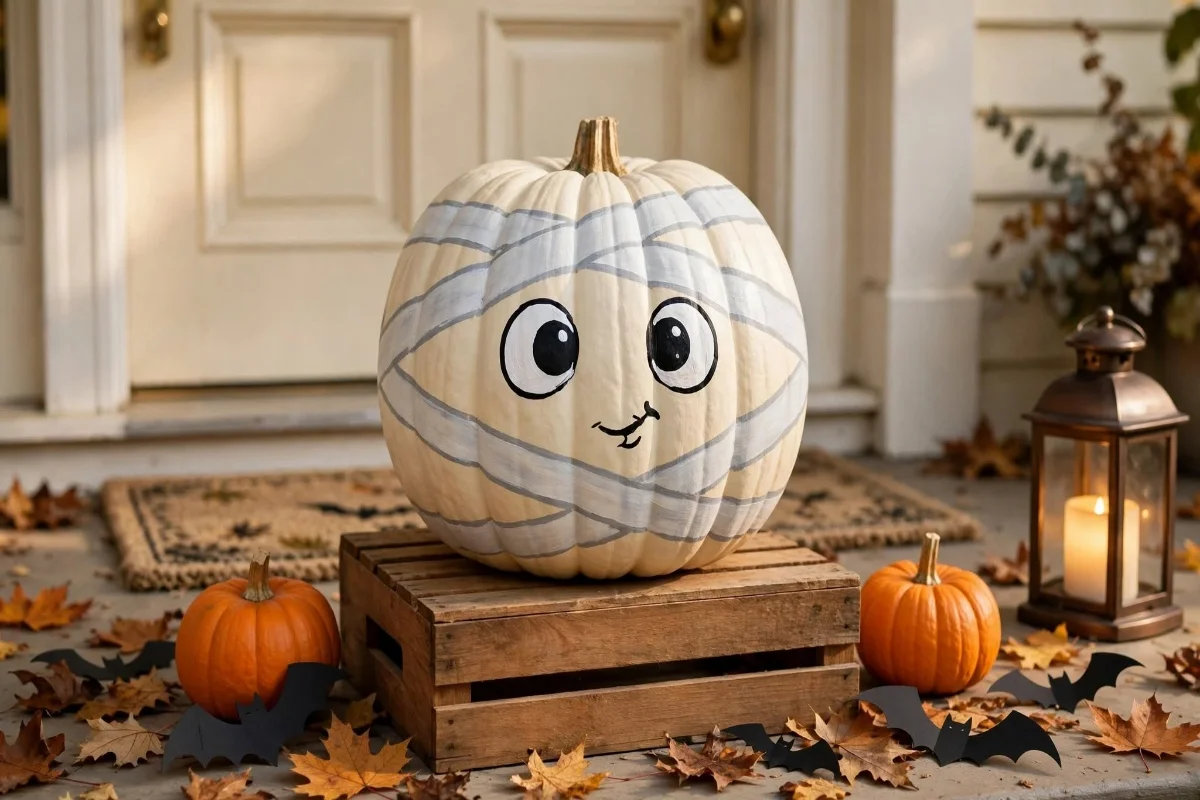
Make a funny mummy pumpkin using a cream-colored base and simple painted bandages. Paint the pumpkin warm ivory, then add curved light-gray lines around its body to resemble mummy wrapping. Leave a large opening on the front for two oversized white eyes with black pupils. Paint a small crooked smile underneath the eyes for a playful expression. Place the finished mummy pumpkin on a wooden crate surrounded by small orange pumpkins, black paper bats, and warm Halloween lights.
Apply two coats of ivory paint and let them dry. Use a pencil to draw wide curved bandage lines following the pumpkin’s natural grooves. Paint the lines light gray, leaving some sections slightly uneven. Add two large cartoon eyes in the middle and finish with a funny mouth. You can use a black paint pen for outlines and a white paint pen for highlights. The design works well because the bandages don’t need to be perfectly straight.
6. Cute Witch Pumpkin With a Purple Hat and Silly Smile
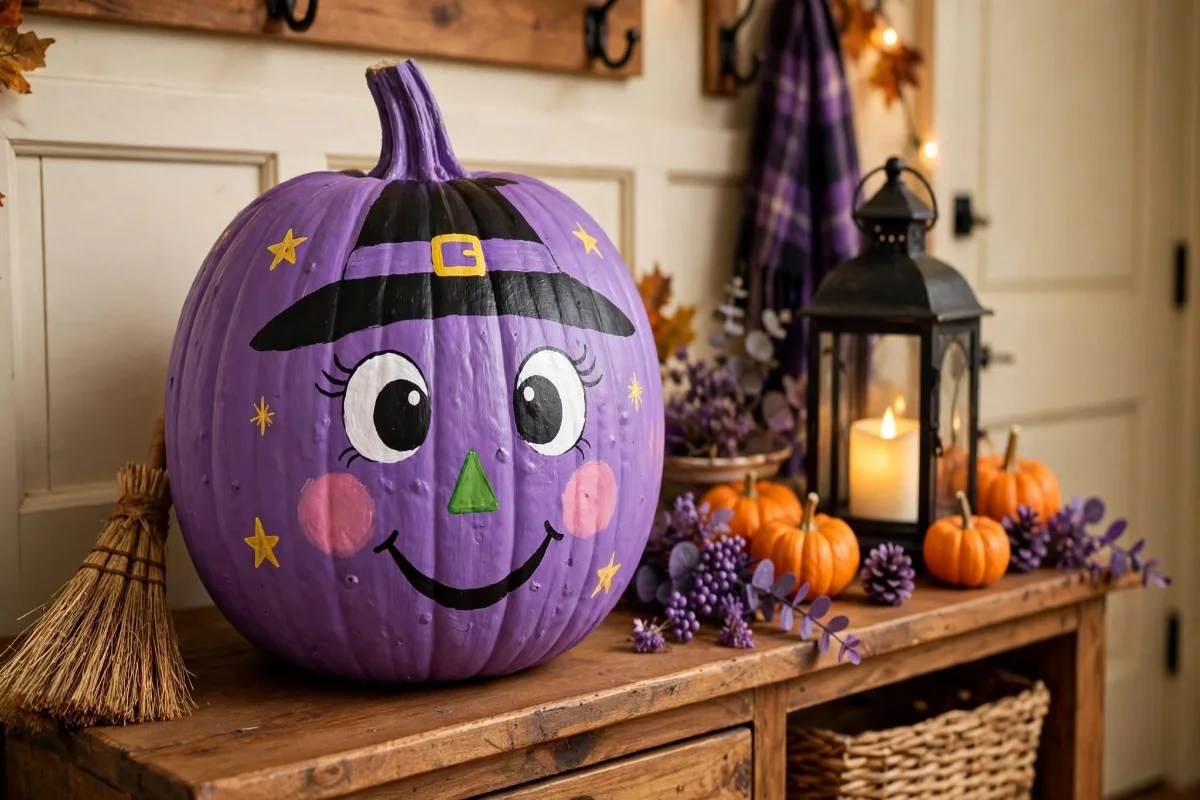
Create a charming witch pumpkin with a bright purple face, funny green nose, and oversized cartoon eyes. Paint the pumpkin a soft purple shade, then add a large smiling mouth, rosy cheeks, and playful eyelashes. Paint a black witch hat shape across the upper front of the pumpkin, with a simple gold buckle and a purple hatband. Add tiny yellow stars around the face and display the pumpkin with a small decorative broom, black lanterns, and orange Halloween decorations.
Paint the pumpkin purple and allow it to dry completely. Sketch the witch’s face and hat with a pencil before filling the shapes with paint. Use black for the hat and facial details, green for the nose, and yellow for the buckle and stars. Keep the hat as a flat painted shape rather than building a real hat. The entire design can be completed using basic shapes such as triangles, circles, and curved lines.
7. Funny Candy Corn Pumpkin With a Happy Face
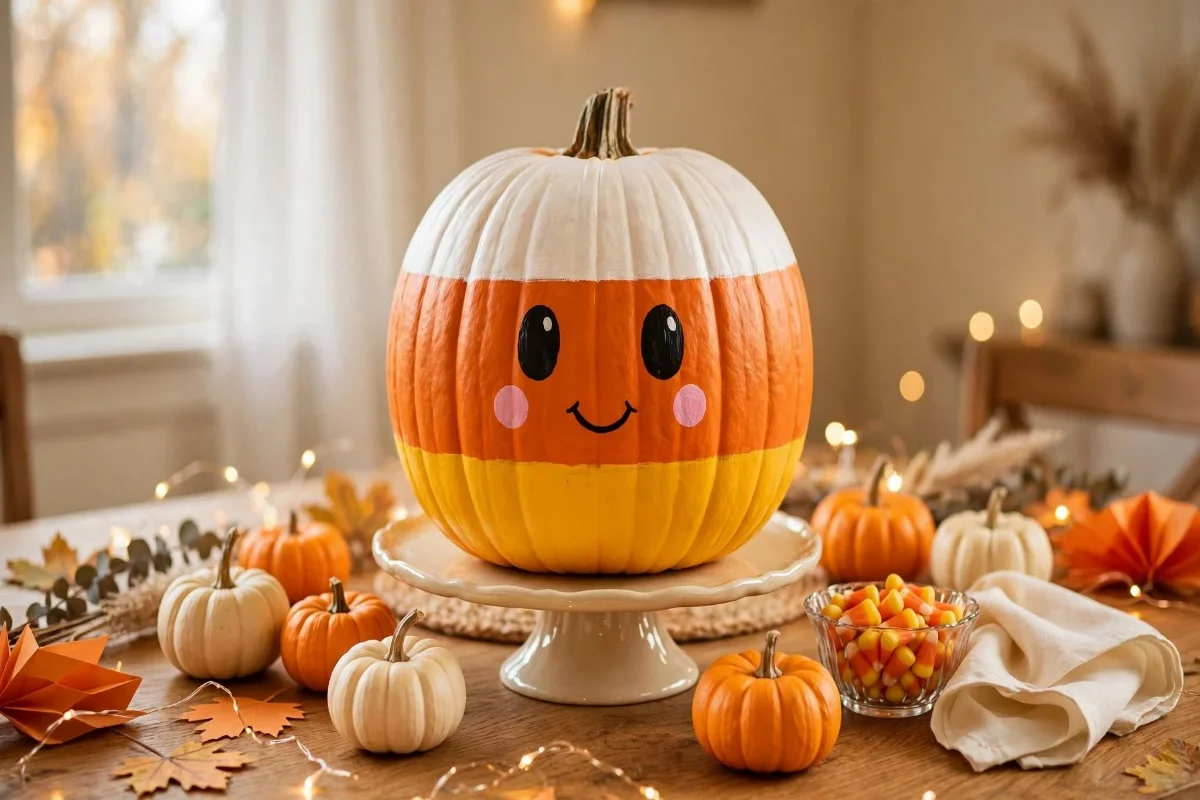
A candy corn pumpkin brings bright Halloween colors into your home without complicated painting. Paint the pumpkin in three horizontal sections: white at the top, orange in the middle, and yellow at the bottom. Add two large black oval eyes, a small smiling mouth, and pink cheeks across the orange section. Paint a few tiny white stars around the face to make the design more playful. Display the pumpkin on a Halloween party table with matching candy bowls, orange napkins, and warm string lights.
Use painter’s tape if you want cleaner color sections, or paint the stripes freehand for a handmade look. Start with the white section, then add orange and yellow after the first color dries. Once the stripes are finished, draw a simple face using a black paint pen. Add pink cheeks with a cotton swab. This is one of the easiest pumpkin painting ideas because the main design uses only three large color blocks.
8. Spooky Spider Pumpkin With a Big Cartoon Web
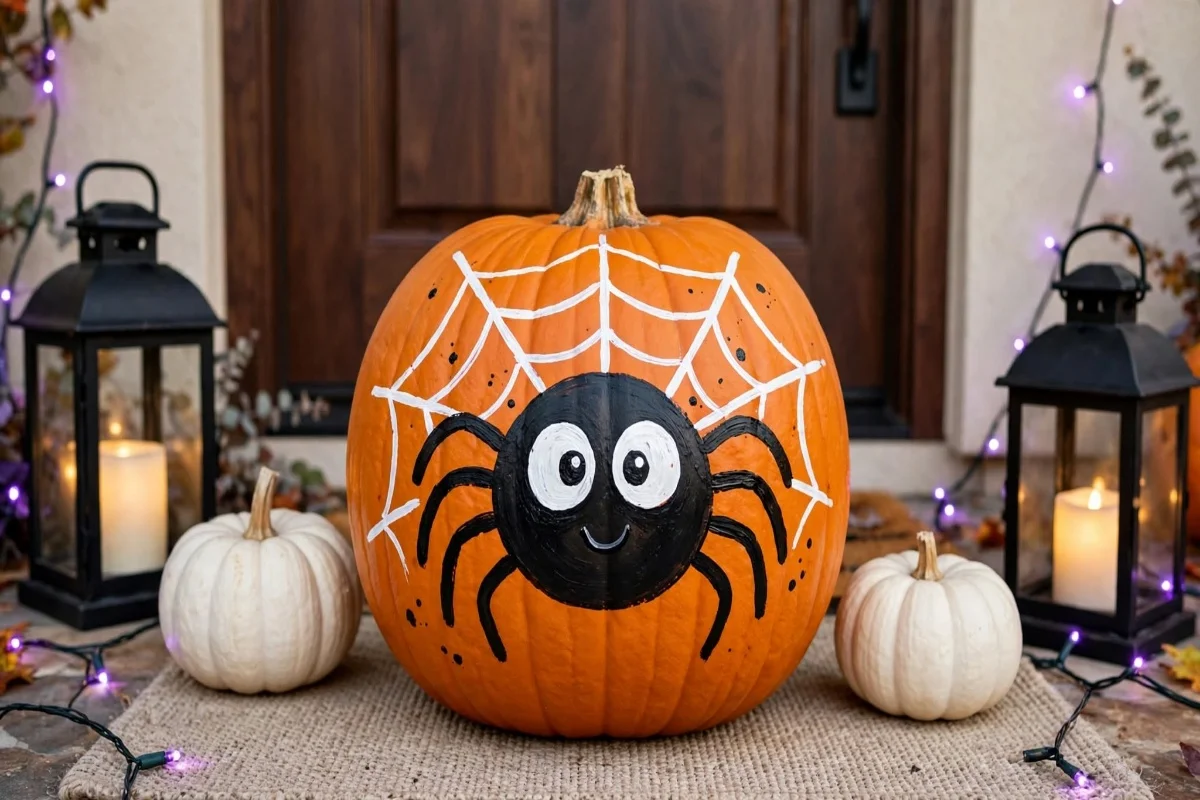
Make a fun spider-themed pumpkin using a bright orange or white pumpkin as the background. Paint a large black cartoon spider on the front with a round body, eight curved legs, two oversized white eyes, and a funny smile. Add a simple white spiderweb behind the spider and a few tiny black dots around the design. Place the pumpkin on a front porch with black lanterns, purple lights, and smaller pumpkins for a playful spooky display.
Keep the pumpkin’s natural orange color if you want to finish faster. Draw the spider’s round body first, then add four curved legs on each side. Fill the spider with black acrylic paint and paint two white eyes. Once dry, add small black pupils and a smiling mouth. Use a white paint pen to draw a few straight and curved lines for the web. The spider doesn’t need realistic details; a bold cartoon shape looks better and is much easier.
9. Silly Skeleton Pumpkin With a Big Toothless Grin
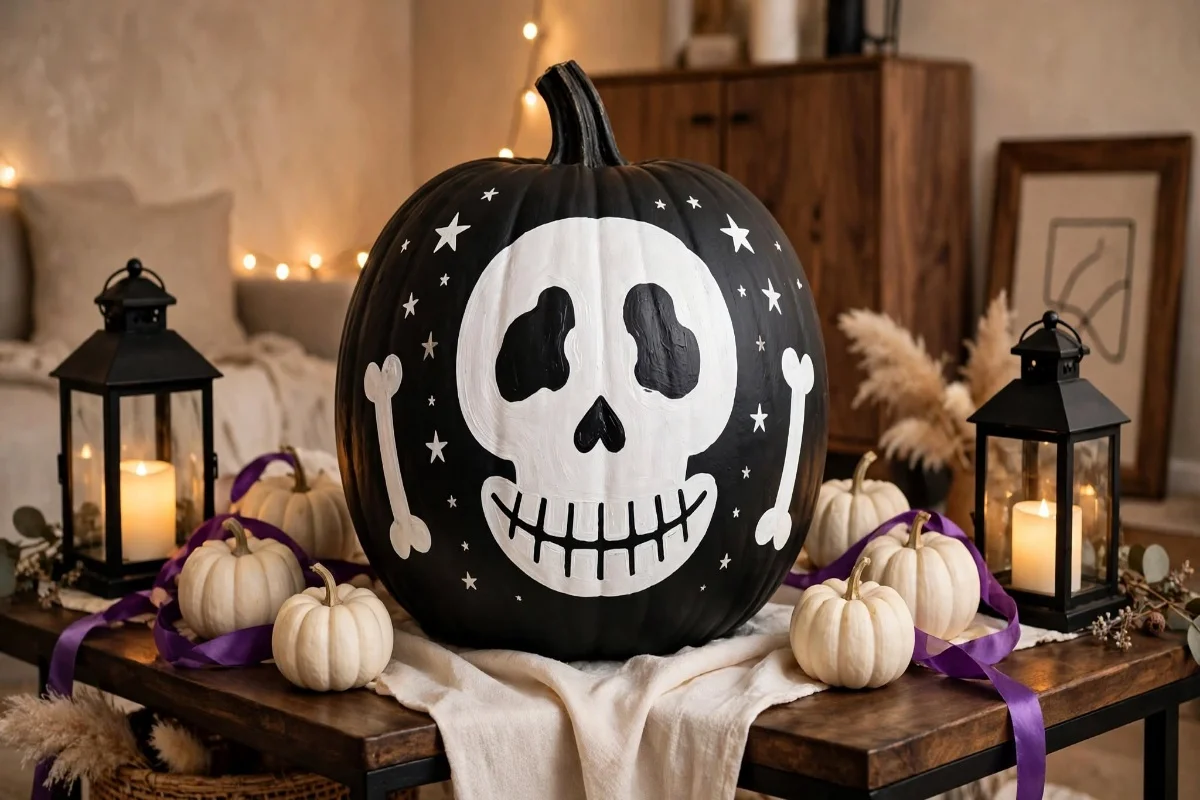
A skeleton pumpkin can look spooky and funny at the same time. Paint the pumpkin matte black, then add a large white cartoon skull face across the front. Give it two uneven black eye sockets, a small upside-down heart-shaped nose, and a wide grin with oversized white teeth. Add tiny white stars and simple bone shapes around the sides. Display it on a black wooden tray with white mini pumpkins, purple ribbon, and warm LED candles for a bold Halloween centerpiece.
Start with a black base coat and let it dry. Paint a large white oval or skull-shaped face on the front, then allow the white layer to dry before adding black eyes and a nose. Draw a long curved smile and divide it into large square teeth using short black lines. Use a paint pen for the smallest details. This design is easier than painting a realistic skeleton because the cartoon face only needs a few simple shapes.
10. Cute Bat Pumpkin With Purple Wings and a Funny Face
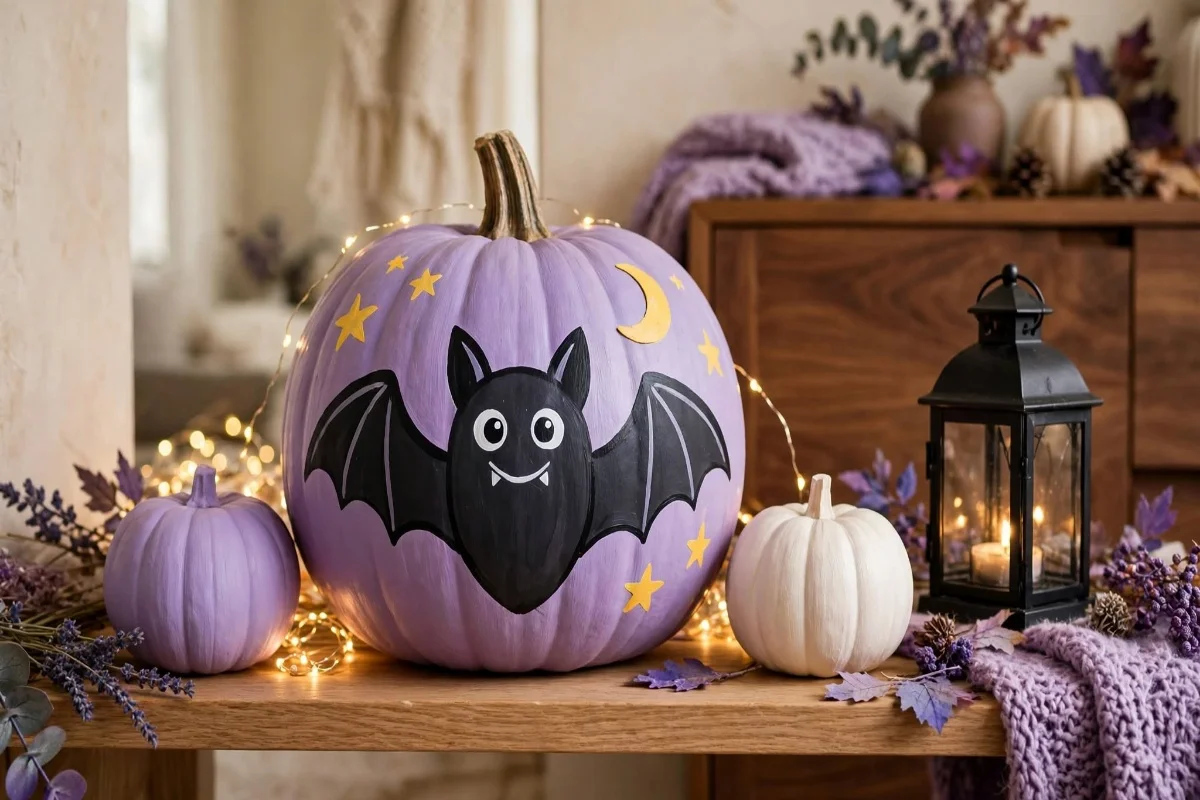
Create an adorable bat pumpkin using a rich purple background and simple black cartoon details. Paint the pumpkin lavender-purple, then add a large black bat face with two pointy ears, round white eyes, tiny white fangs, and a cheerful smile. Paint two wide bat wings spreading across the sides of the pumpkin. Add small yellow stars and a crescent moon around the bat to create a playful Halloween night scene. Display it on a bedroom shelf or party table with purple decorations and warm fairy lights.
Apply two coats of purple acrylic paint. Once dry, sketch the bat’s round head and two large wings using a pencil. Fill the shapes with black paint and let them dry before adding eyes, fangs, and facial details. Use a yellow paint pen to make the stars and moon. Keep the wing edges simple with three curved points on each side. This gives you a recognizable bat without difficult painting techniques.
11. Funny Pumpkin With a Big Monster Mouth and Colorful Teeth
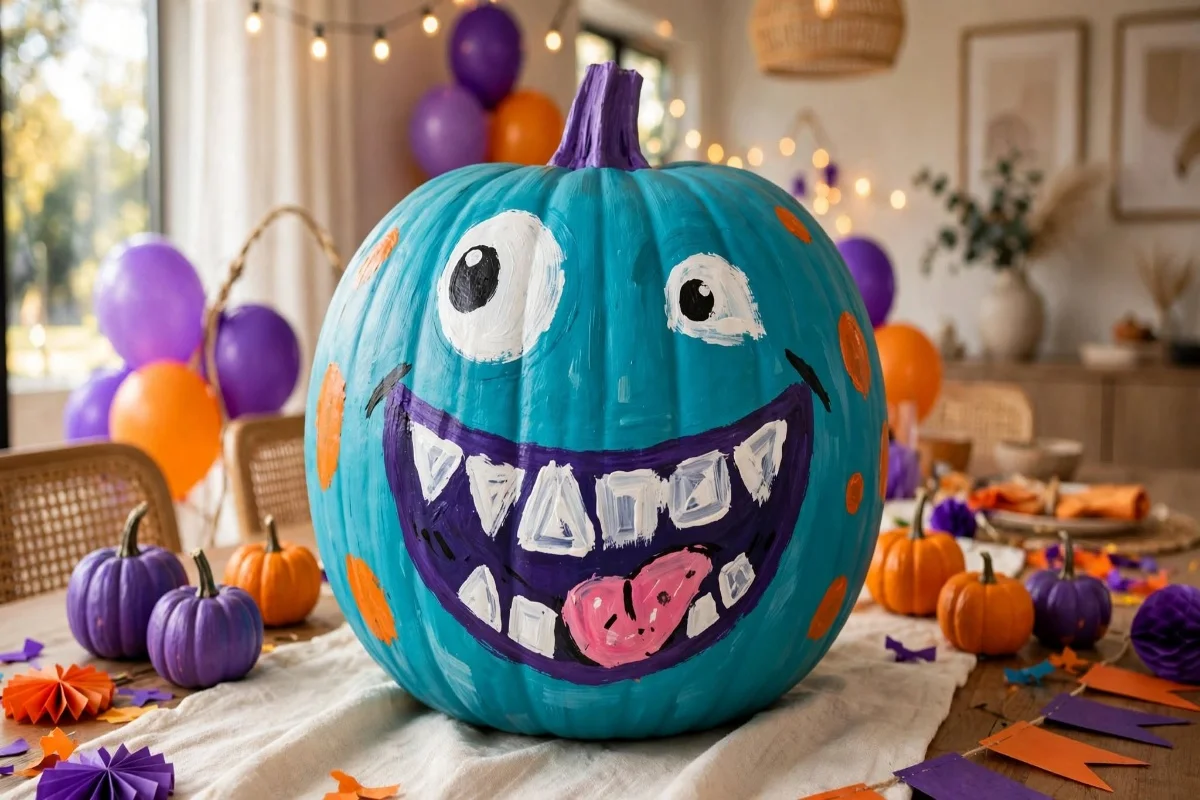
Turn a pumpkin into a hilarious Halloween monster with an oversized mouth and silly expression. Paint the pumpkin turquoise or bright teal, then add two mismatched cartoon eyes near the top. Paint a giant dark purple mouth across the middle with large uneven white teeth, a pink tongue, and tiny black freckles. Add simple orange spots around the sides and a bright purple stem. Display it with colorful Halloween balloons, small pumpkins, and matching party decorations.
Begin with a turquoise base coat and let it dry. Draw the large mouth first because it should take up most of the pumpkin’s front. Fill it with dark purple, then paint large white triangle and rectangle teeth along the edges. Add a pink tongue and two big eyes with different-sized pupils. Finish with orange spots using a cotton swab. The uneven teeth and mismatched eyes make this design funny, so there’s no need for precise painting.
12. Ultimate Funny Halloween Pumpkin Family With Different Cartoon Faces
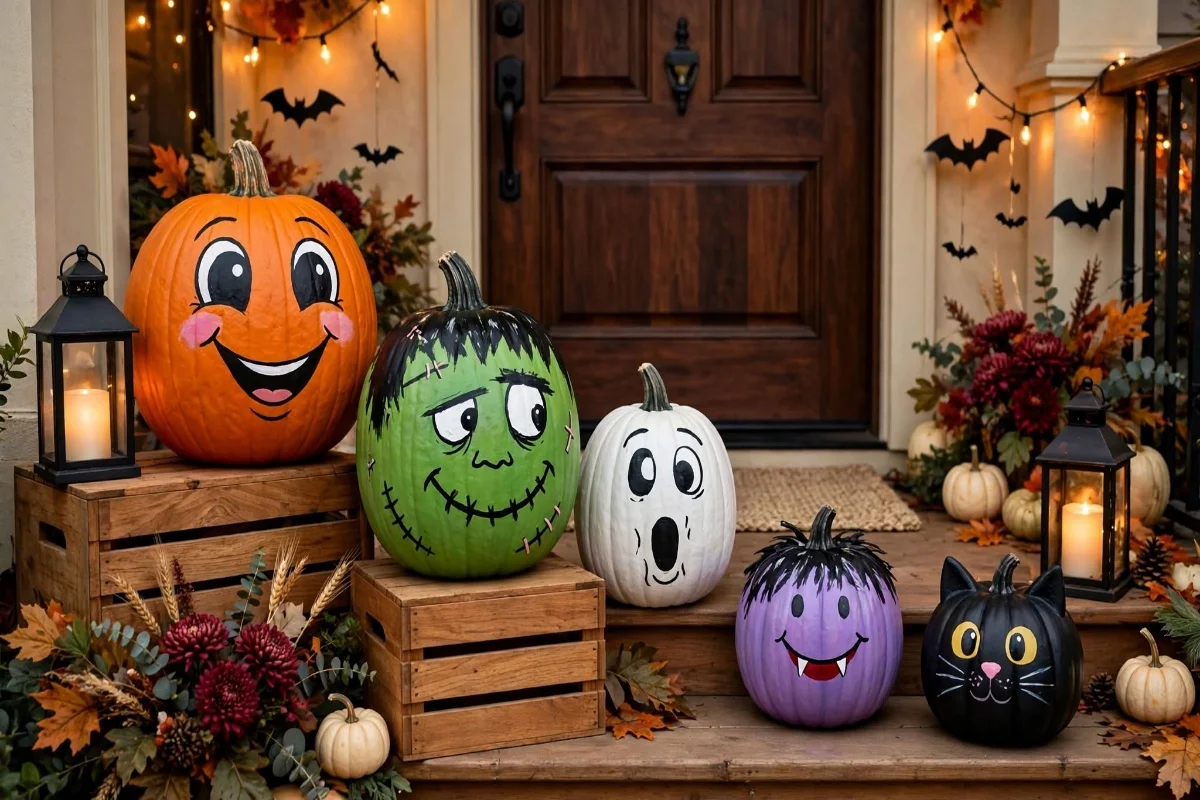
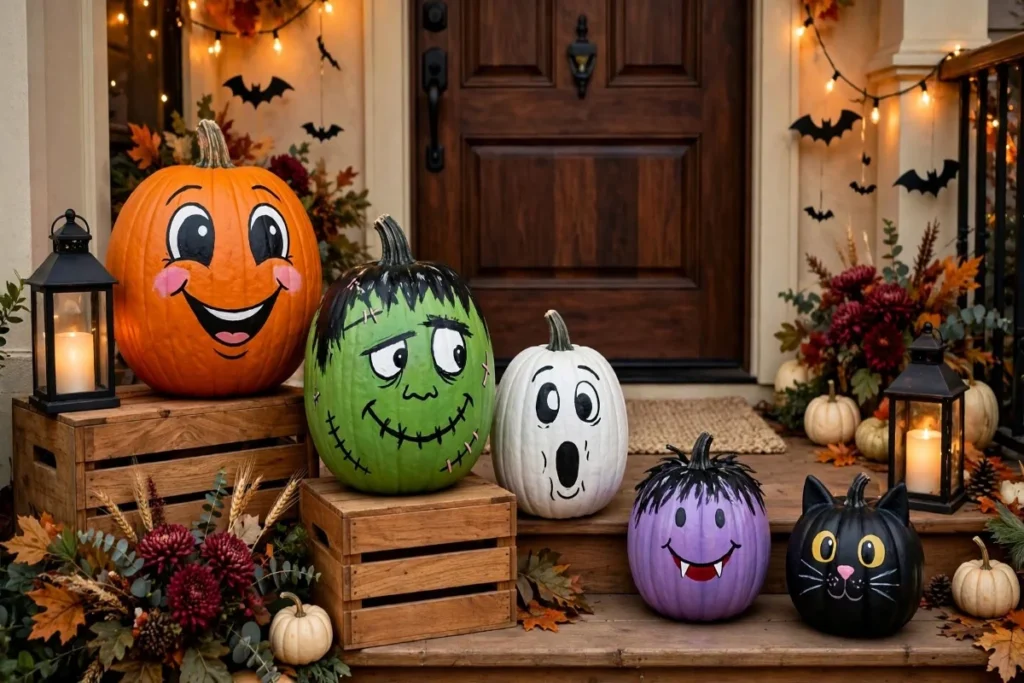
Create an unforgettable Halloween display with a family of five painted pumpkins, each featuring a different silly Halloween character. Use one large orange pumpkin with a laughing face, one medium green Frankenstein pumpkin, one white ghost pumpkin with surprised eyes, one purple vampire pumpkin with funny fangs, and one small black cat pumpkin with yellow eyes. Arrange them together on wooden crates with black lanterns, orange fairy lights, paper bats, and a cozy Halloween welcome mat. The mix of colors and expressions creates a cheerful, eye-catching display that’s perfect for a front porch or Halloween party.
Start with five pumpkins in different sizes and paint each one a separate base color. Use large circles, triangles, curved mouths, and simple lines to create the faces. Make every character’s expression different: laughing, surprised, sleepy, mischievous, or silly. Let the paint dry before arranging the pumpkins at different heights. If you want an easier project, use three pumpkins instead of five and choose your favorite characters from the group.
Best Supplies for Easy Halloween Pumpkin Painting
You don’t need expensive painting tools for these DIY ideas.
Most of the designs can be completed with a few affordable craft supplies.
Essential Pumpkin Painting Supplies
- Small and medium pumpkins, real or faux.
- Water-based acrylic craft paint.
- Black and white acrylic paint pens.
- Small round paintbrushes.
- One medium flat paintbrush.
- Foam brushes for base coats.
- Pencil for sketching faces.
- Painter’s tape for stripes.
- Cotton swabs for cheeks and dots.
- Paper towels and a cup of water.
- Disposable table covering or newspaper.
- Optional clear protective sealer compatible with your pumpkin and paint.
Best Paint Colors to Buy
For these 12 designs, useful colors include:
- White
- Black
- Orange
- Purple
- Lavender
- Green
- Yellow
- Pink
- Red
- Turquoise
- Gray
You don’t need every color for one project.
Choose the paints that match your favorite pumpkin design.
How to Paint a Halloween Pumpkin for Beginners
Follow these simple steps to create a beautiful painted pumpkin.
Step 1: Choose a Smooth Pumpkin
Select a pumpkin with a firm surface and no soft spots.
A relatively smooth front makes painting cartoon faces much easier.
Step 2: Clean the Pumpkin
Wipe away dirt with a slightly damp cloth.
Allow the surface to dry completely.
Step 3: Paint the Base Color
Use a foam brush to apply a thin coat of acrylic paint.
Allow it to dry before adding another coat if needed.
Step 4: Draw the Cartoon Face
Use a pencil to sketch the main eyes, mouth, and other features.
Keep the shapes large and simple.
Step 5: Paint the Biggest Shapes First
Start with large eyes, hair, wings, or mouths.
Don’t worry about tiny details yet.
Step 6: Add Small Details
Use paint pens for pupils, teeth, freckles, stitches, stars, or outlines.
These small details give each pumpkin personality.
Step 7: Let Everything Dry
Follow the paint manufacturer’s drying instructions.
Avoid touching wet areas while adding other colors.
Step 8: Decorate Your Halloween Display
Arrange your pumpkins with lanterns, smaller pumpkins, party decorations, or warm LED lights.
A few coordinated accessories can make simple painted pumpkins look much more impressive.
5 Easy Painting Tricks That Make Pumpkins Look Better
1. Make the Eyes Big
Oversized eyes instantly make cartoon pumpkins look funnier and more expressive.
2. Use Black Outlines
A thin black outline makes colorful characters stand out.
3. Paint Simple Shapes
Circles, triangles, ovals, and curved lines are enough to create ghosts, monsters, cats, bats, and vampires.
4. Choose Bright, Coordinated Colors
Purple, orange, green, black, and white work beautifully for playful Halloween decorations.
5. Give Every Pumpkin a Different Expression
Try surprised eyes, sleepy eyes, crooked smiles, funny teeth, or raised eyebrows.
This makes a group of pumpkins look more interesting.
Easy Halloween Pumpkin Painting Ideas for Kids
Some pumpkin designs are especially suitable for children and beginners.
Funny Ghost Pumpkin: Uses white paint, black eyes, and a simple mouth.
Candy Corn Pumpkin: Uses three large color sections and a happy face.
Goofy Frankenstein Pumpkin: Uses green paint, black hair, and simple stitches.
Cute Bat Pumpkin: Uses purple paint and easy wing shapes.
Funny Monster Mouth Pumpkin: Uses large colorful shapes without complicated details.
For younger children, adults can paint the base color and let the children add faces once the paint dries.
Use age-appropriate, non-toxic supplies and supervise children during painting.
How to Make a Halloween Pumpkin Painting Party Fun
A pumpkin painting party is an easy Halloween activity for families, friends, and children.
Set up a table with washable coverings, paintbrushes, acrylic paints, water cups, and paper towels.
Give everyone a pumpkin and let them choose a funny Halloween character.
You can make the activity more exciting with a few simple themes:
- Funniest pumpkin face.
- Cutest Halloween character.
- Silliest monster.
- Most colorful pumpkin.
- Spookiest cartoon face.
Display everyone’s finished pumpkins together once the paint dries.
Use LED string lights, paper bats, and Halloween decorations to create a fun photo area.
Real Pumpkins vs. Faux Pumpkins: Which Is Better for Painting?
Both options can work well.
Real Pumpkins
Real pumpkins are great for seasonal decorations and family activities.
They have natural shapes and textures that make each design unique.
However, they eventually decay, and paint may not adhere equally well to every surface.
Faux Pumpkins
Faux pumpkins are useful if you want decorations that last for several Halloween seasons.
They can also be easier to paint if you choose a smooth craft surface and suitable primer.
Check the material and paint instructions before starting.
My Recommendation
For a one-day family painting party, real pumpkins are a fun option.
For detailed decorations you want to reuse every year, choose paintable faux pumpkins.
Common Pumpkin Painting Mistakes to Avoid
Using Too Much Paint
Thick layers can take longer to dry and may look uneven.
Apply thin coats instead.
Adding Details Before the Base Dries
Wet paint can mix with other colors and create messy lines.
Let the base dry first.
Making the Face Too Small
Tiny facial features can disappear when the pumpkin is displayed.
Use big eyes and bold expressions.
Choosing Complicated Designs
Start with simple cartoons rather than detailed portraits or realistic paintings.
Using Too Many Decorations
Let the painted pumpkin be the main attraction.
Use a few coordinated accessories around it.
Forgetting About Drying Time
Painted pumpkins need enough time to dry before being moved or displayed.
Plan your painting activity accordingly.
Frequently Asked Questions About Easy Halloween Pumpkin Painting
What is the easiest thing to paint on a Halloween pumpkin?
A funny ghost face is one of the easiest designs. Paint the pumpkin white, add two black eyes, and finish with a simple mouth.
What are some funny pumpkin painting ideas?
Funny monster faces, surprised ghosts, silly Frankenstein characters, cartoon vampires, goofy mummies, and colorful pumpkins with big teeth are great options.
Can beginners paint Halloween pumpkins?
Yes. Most cartoon pumpkin designs use basic shapes and a few colors, making them suitable for beginners.
What paint should I use for Halloween pumpkins?
Water-based acrylic craft paint is a common choice. Acrylic paint pens are useful for small details and outlines.
Can kids paint pumpkins?
Yes. Pumpkin painting can be a fun supervised activity for children. Choose age-appropriate, non-toxic supplies and simple designs.
How do you paint pumpkin faces without making mistakes?
Sketch the face lightly with a pencil first. Paint the largest shapes, let them dry, and finish with small details using paint pens.
Do I have to paint the entire pumpkin?
No. You can leave the pumpkin orange and paint a face or cartoon character directly onto it.
How do I make my painted pumpkins look cute?
Use oversized eyes, rounded shapes, pink cheeks, funny smiles, and bright but coordinated colors.
How long does it take to paint a pumpkin?
A simple face may take around 15–30 minutes of active painting, while designs with full base coats need additional drying time.
Can I reuse painted pumpkins next Halloween?
Yes, if you use suitable faux pumpkins and store them carefully in a dry place.
Final Thoughts
Halloween pumpkin painting doesn’t need to be difficult to look amazing.
A few simple colors, funny cartoon faces, big eyes, and creative expressions can turn ordinary pumpkins into adorable Halloween decorations.
Whether you choose a goofy Frankenstein, surprised ghost, silly vampire, cute black cat, funny mummy, or colorful monster, every design can bring personality to your Halloween celebration.
Start with one easy character, enjoy the painting process, and arrange your finished pumpkins with cozy Halloween decorations.
Save these 12 easy Halloween pumpkin painting ideas on Pinterest so you can recreate your favorite designs for your next Halloween party or seasonal decorating project.