
Halloween is almost here, and there’s nothing more exciting than decorating your home with beautifully carved pumpkins. But finding pumpkin carving ideas that are both easy and impressive can feel surprisingly difficult.
Some pumpkin designs look amazing online but require special tools, artistic skills, or hours of careful cutting. Others are so basic that they don’t create the beautiful Halloween look you’re hoping for.
The good news? You don’t need to be an artist to carve a pumpkin that looks incredible.
With a sharp design, a simple pattern, and a little creativity, you can turn an ordinary pumpkin into a Halloween decoration that looks much more complicated than it actually is.
Whether you love cute pumpkin faces, spooky Halloween designs, or elegant glowing patterns, there are plenty of beginner-friendly options worth trying.
These 7 surprisingly easy pumpkin carving ideas use simple shapes and practical techniques that anyone can learn. Each design looks beautiful when displayed on a front porch, doorstep, or outdoor table.
You’ll also find helpful carving tips, tool recommendations, and realistic design inspiration to make your Halloween pumpkins stand out.
1. Classic Happy Jack-O’-Lantern With a Big Toothy Smile
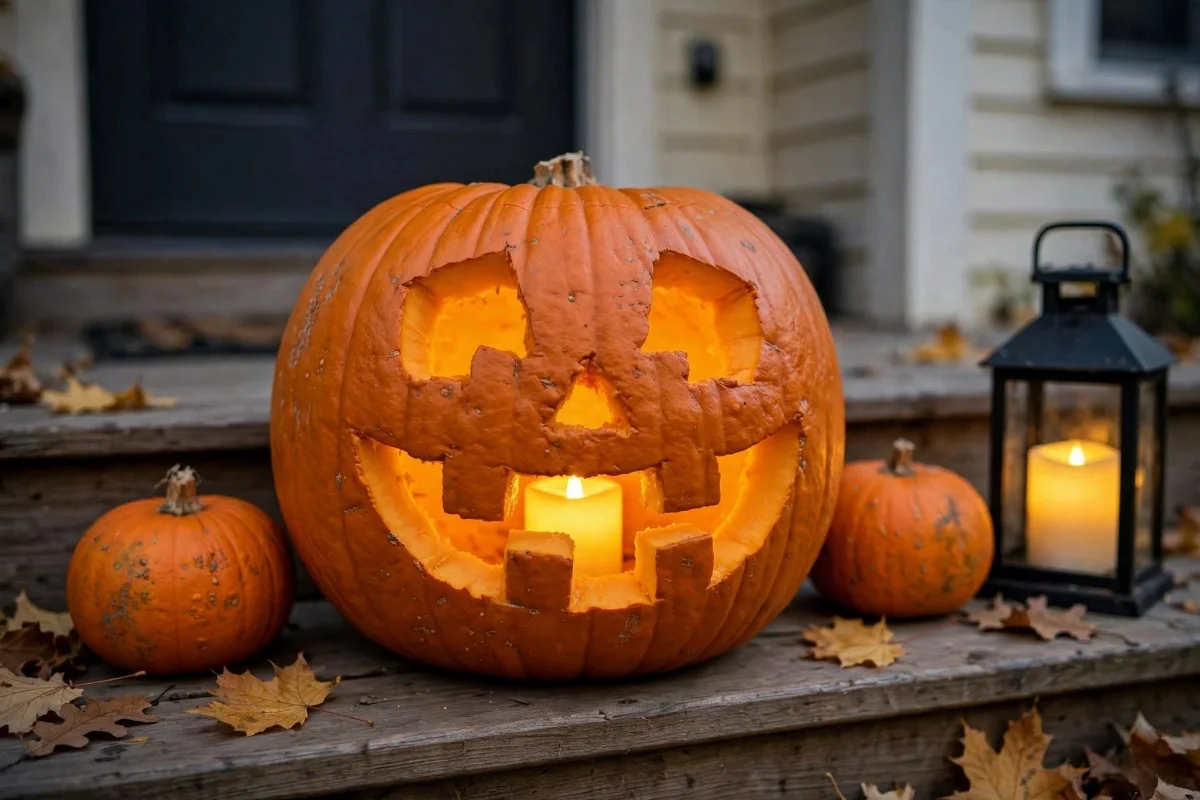
A classic jack-o’-lantern doesn’t have to look boring. Instead of carving a simple face, give your pumpkin two large triangle eyes, a small triangle nose, and a wide curved smile with four square teeth. The secret is making the eyes slightly tilted and keeping the mouth large enough for the light inside to shine through. Choose a medium-sized orange pumpkin with a smooth front surface so the face is easy to draw and carve. The finished pumpkin will look cheerful during the day and beautifully glowing after dark.
To make this design, draw the face with a washable marker before cutting. Carefully carve the eyes and nose first, then work on the mouth in small sections. Keep the teeth thick enough that they won’t break while carving. Place a battery-operated LED candle inside and display your pumpkin on the front steps beside two smaller uncarved pumpkins. The combination creates a classic Halloween look that’s easy to recreate and perfect for families.
2. Cute Ghost Pumpkin With a Glowing Face
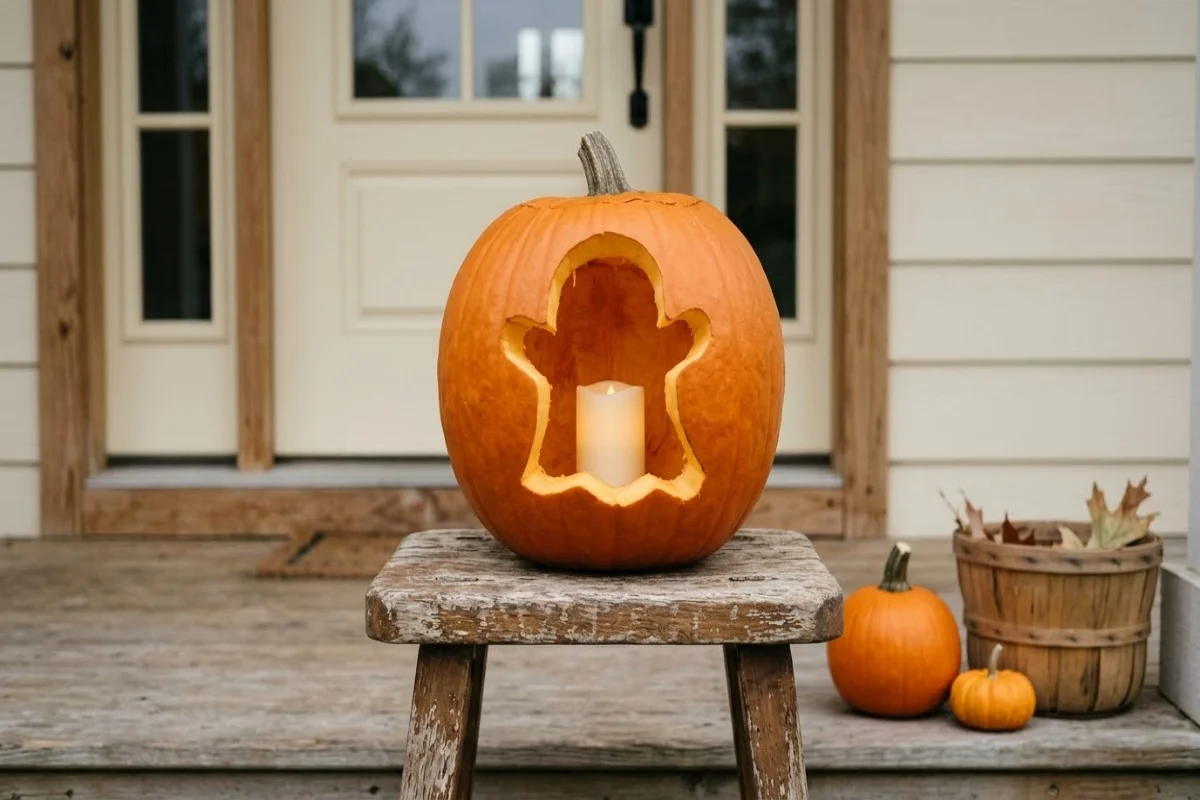
A ghost design is a wonderful choice if you want something cute, spooky, and different from a traditional pumpkin face. Instead of carving several complicated details, create one large ghost-shaped opening on the front of your pumpkin. Give the ghost a gently curved head, two small rounded arms, and a wavy bottom edge. Leave two small oval sections of pumpkin uncut for the eyes only if your stencil keeps them securely connected; otherwise, carve two simple eye openings and let the glowing interior define the ghost’s expression. The result is a charming Halloween pumpkin that looks especially beautiful when illuminated.
Start by drawing a simple ghost outline on paper and taping it to your pumpkin. Trace the shape, remove the paper, and carefully cut along the outline using a pumpkin carving saw. Keep the curves wide and avoid tiny details that are difficult to carve. After removing the cut section, smooth any rough edges and place a warm white LED candle inside. Display the finished ghost pumpkin on a wooden stool or beside a small group of orange pumpkins for an adorable Halloween arrangement.
3. Spooky Cat Face Pumpkin With Pointed Ears
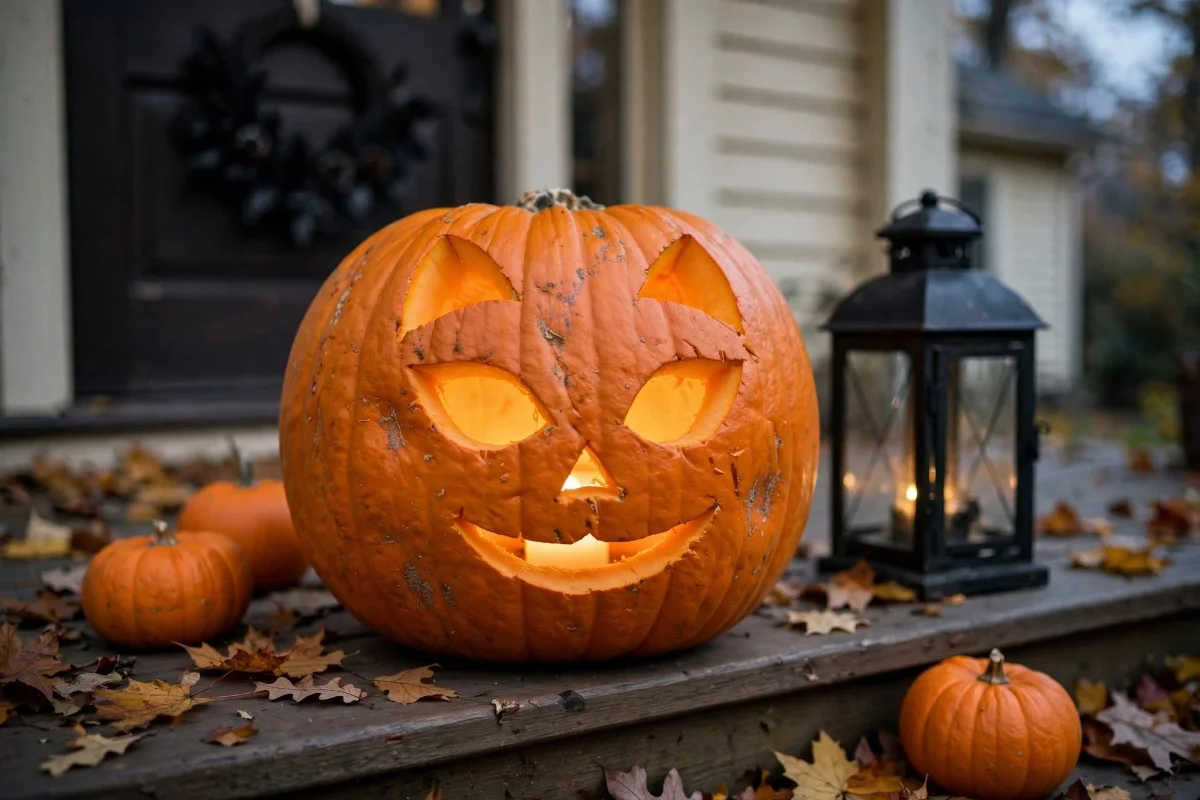
If you love black cats and classic Halloween decorations, a cat-face pumpkin is an excellent carving project. Choose a round orange pumpkin and create a design featuring two pointed triangular ears near the top of the face, two narrow almond-shaped eyes, a small triangle nose, and a simple curved mouth. Add three short whisker lines on each side, but make them wide enough to carve safely without breaking the pumpkin skin. The combination of pointed shapes and glowing eyes creates a recognizable cat face without requiring complicated artwork.
Draw your cat design directly onto the pumpkin using a washable marker or a printed stencil. Start by carving the eyes and nose, then carefully cut the mouth and whisker openings. For an easier version, skip the whiskers and use only the ears, eyes, nose, and mouth. Place an LED candle inside to make the cat’s expression glow. This pumpkin looks particularly beautiful beside a black Halloween lantern, a few smaller pumpkins, and a simple autumn wreath on your front porch.
4. Beautiful Starry Night Pumpkin With Glowing Stars
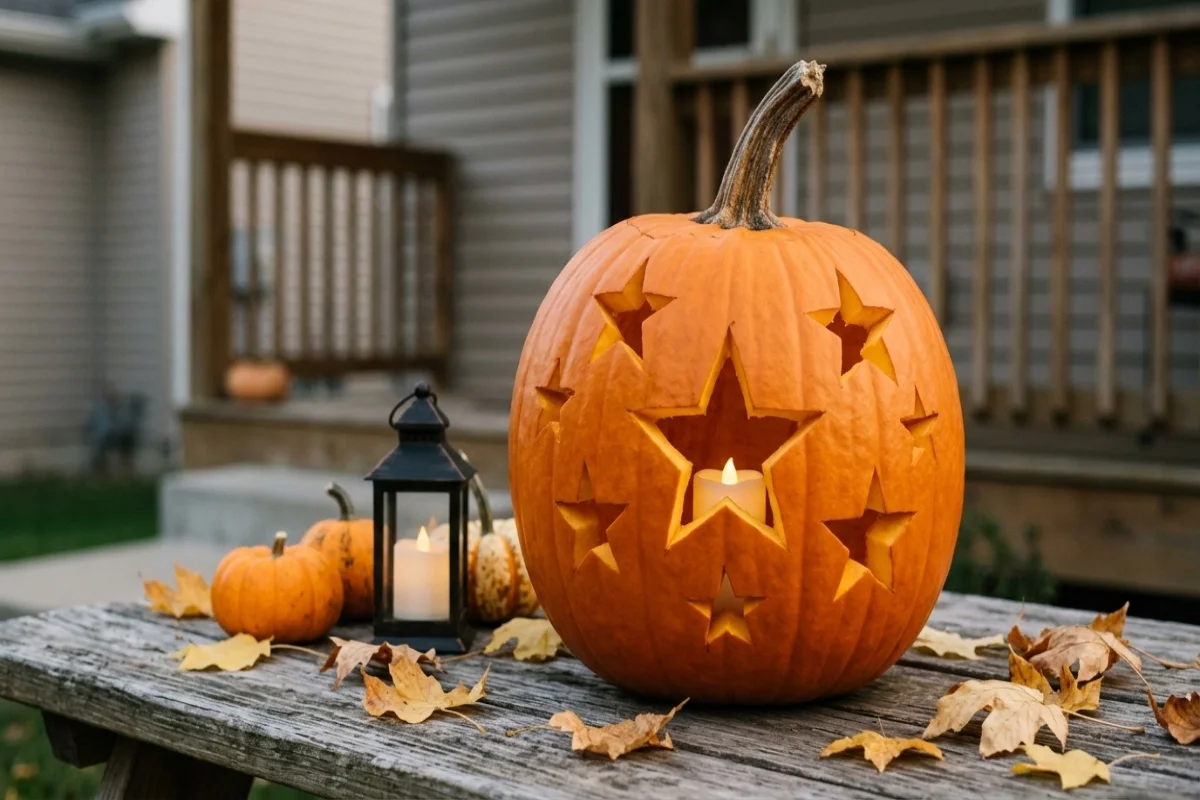
A starry night pumpkin is one of the prettiest ways to create a Halloween decoration without carving a traditional face. Instead of complicated patterns, carve several large five-pointed stars across the front of a medium-sized pumpkin. Use three different star sizes and arrange them in a loose scattered pattern, leaving enough space between each shape to keep the pumpkin strong. The glowing star cutouts create a beautiful warm effect that looks especially attractive on a porch table or beside a front door.
To make this design easier, print a few simple star templates and trace them onto your pumpkin. Carve the larger stars first using a small pumpkin saw, then add two or three smaller stars to balance the arrangement. Avoid making the points too narrow, as they can be difficult to cut neatly. Once finished, remove any loose pumpkin pieces and place a warm LED light inside. Display your starry pumpkin with a few autumn leaves and a small lantern for an elegant Halloween decoration.
5. Funny Monster Pumpkin With One Big Eye
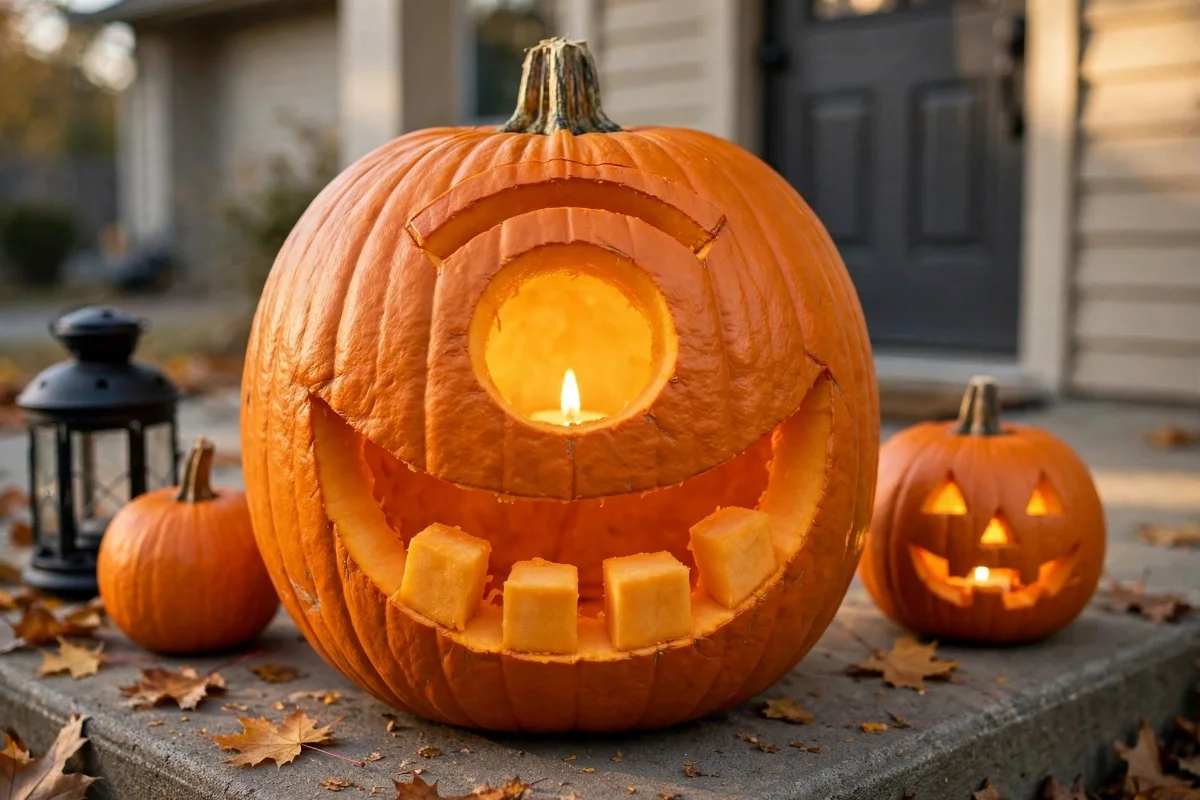
A funny monster pumpkin is perfect for anyone who wants a playful design that looks creative without taking hours to carve. Give your pumpkin one large round eye in the center, a small curved eyebrow above it, and a wide mouth filled with chunky square teeth. The oversized eye makes the design instantly recognizable, while the exaggerated mouth adds personality. Choose a wide pumpkin with a relatively flat front so you have enough room to carve the features without placing them too close together.
Begin by drawing a large circle for the eye and a wide curved mouth below it. Use a thick outline for the eyebrow and leave generous spaces between the teeth so the pumpkin remains sturdy. Carve the smaller sections first and remove the large mouth opening last. A warm LED candle will make the eye and smile glow beautifully at night. For a fun Halloween porch display, place your monster pumpkin beside a smaller classic jack-o’-lantern and a simple black lantern.
6. Elegant Moon and Stars Pumpkin Design

If you want a pumpkin that looks stylish rather than scary, a crescent moon and stars design is a beautiful option. Carve one large crescent moon on the front of your pumpkin and surround it with three or four small stars. Keep the moon thick enough to form a clear glowing shape, and position the stars at different heights for a balanced appearance. This simple design creates a lovely nighttime effect without requiring complicated carving skills. It also works beautifully with neutral fall decorations and farmhouse-style Halloween porches.
Start by tracing a large crescent moon stencil onto a smooth pumpkin. Carefully carve the curved moon shape using short, controlled cuts. Next, trace three or four simple stars around it and carve them one at a time. Keep plenty of solid pumpkin between the shapes to prevent weak sections. Add a warm battery-operated candle inside and place the pumpkin on a wooden tray with a few mini pumpkins and autumn foliage. The glowing moon and stars will create an elegant seasonal display.
7. Cute Owl Pumpkin With Big Round Eyes
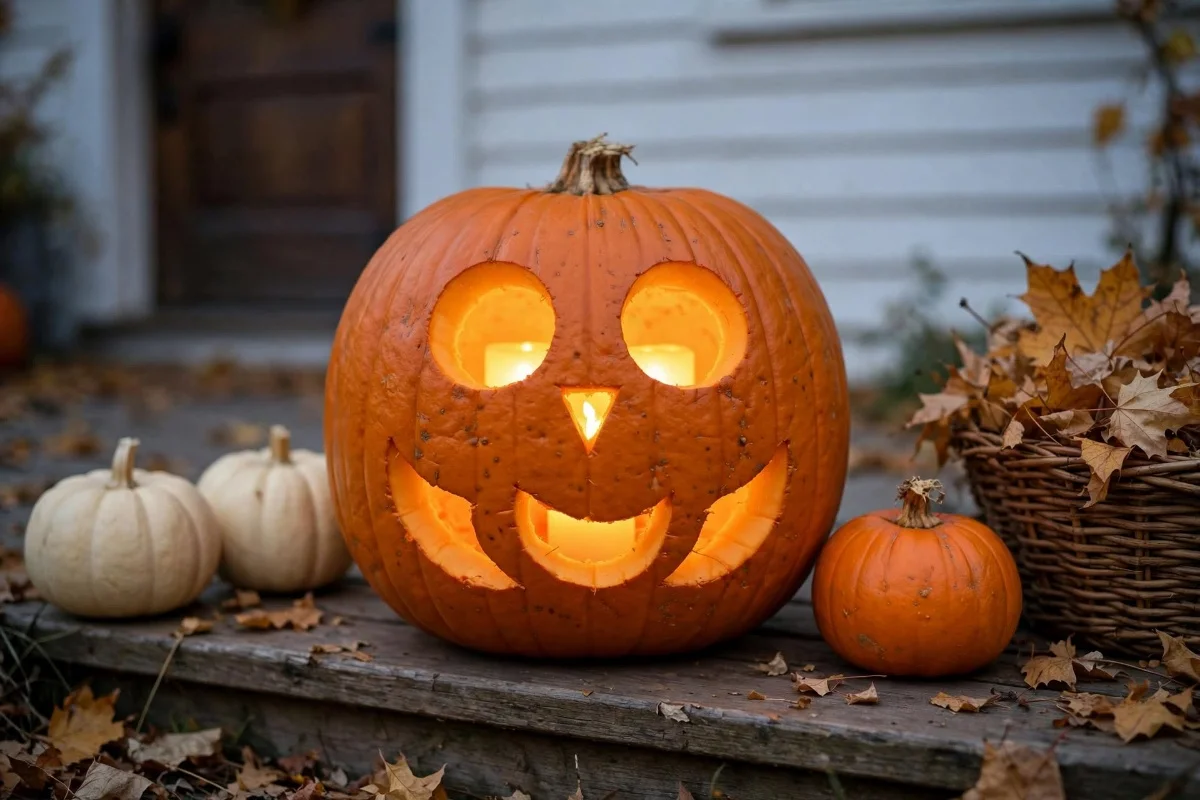
An owl pumpkin is a lovely choice for creating a Halloween decoration that feels cute, creative, and a little unexpected. Give your pumpkin two large round eyes, a small triangle beak, and a simple curved feather pattern beneath the face. The key is keeping the owl’s features bold and easy to recognize rather than attempting detailed feathers. Choose a medium-sized pumpkin with a wide front, and make the eyes the largest part of the design so the pumpkin looks expressive when illuminated.
Draw two large circles for the eyes and a small triangle between them for the beak. Add three or four wide curved feather shapes beneath the face, keeping the cuts simple. Carefully carve the eyes and beak before moving to the lower details. If the feather pattern feels too difficult, leave it out and focus on the owl’s large eyes and pointed beak. Place an LED candle inside and display your owl pumpkin on a porch step beside a few natural pumpkins and a small basket of autumn leaves. The finished design looks charming during the day and beautifully glowing at night.
How to Carve a Pumpkin Easily Without Making a Mess
Pumpkin carving can be a fun Halloween activity, but preparing your workspace and choosing the right tools can make the process much easier.
Choose the Right Pumpkin
Look for a pumpkin with firm skin, a sturdy stem, and a smooth front surface. Avoid pumpkins with soft spots, cracks, or signs of mold.
Medium-sized pumpkins are often easier for beginners because they provide enough space for a design without being too heavy to handle.
A slightly flattened front can also make tracing and carving your pattern easier.
Prepare Your Workspace
Cover your table with old newspapers, a washable tablecloth, or a large cutting mat.
Keep a bowl or bag nearby for pumpkin seeds and pulp.
Choose a stable working surface with good lighting so you can clearly see the lines of your design.
Use Beginner-Friendly Carving Tools
A basic pumpkin carving kit is usually enough for the designs in this article.
Useful tools include a pumpkin scoop, a small serrated pumpkin saw, a washable marker, and printed stencils.
Avoid using large kitchen knives for detailed carving. A purpose-made pumpkin saw offers better control for small patterns, though it still requires careful handling.
Draw Your Design Before Carving
One of the easiest ways to avoid mistakes is to sketch your design before making any cuts.
Use a washable marker to draw the eyes, mouth, stars, or other shapes.
If you’re unsure about your drawing skills, print a simple stencil and trace it onto the pumpkin.
Keep Your Shapes Large and Simple
Small details are harder to carve and more likely to break.
For beginner-friendly pumpkin designs, use wide openings, simple curves, and bold shapes.
This also allows more light to shine through the finished pumpkin.
Use Battery-Operated Lights
Battery-operated LED candles are a practical choice for illuminating carved pumpkins.
They create a warm glow without introducing an open flame near dry leaves, porch decorations, or other combustible materials.
Choose outdoor-suitable lights if your pumpkins will be displayed where they may get wet.
How to Make Your Carved Pumpkins Look More Beautiful
A few simple styling tricks can make even an easy pumpkin carving design look more impressive.
Use Pumpkins in Different Sizes: Place your carved pumpkin beside two or three smaller uncarved pumpkins to create a fuller display.
Choose Warm LED Lighting: Warm white lights create a traditional glowing jack-o’-lantern appearance and help show off the carved shapes.
Display Pumpkins at Different Heights: A sturdy wooden crate, low stool, or porch step can add visual interest to your Halloween arrangement.
Keep the Carving Edges Clean: Remove loose pumpkin fibers around the openings so the shapes look clear when illuminated.
Choose a Simple Background: A dark front door, wooden porch, or neutral wall can help the glowing pumpkin design stand out.
Avoid Overcrowding: A few beautifully carved pumpkins usually create a stronger visual effect than too many decorations placed together.
How Long Do Carved Pumpkins Last?
Carved pumpkins generally have a shorter lifespan than uncarved pumpkins because cutting exposes the inside to air, moisture, and microorganisms.
Depending on temperature and weather conditions, a carved pumpkin may remain attractive for only a few days to around a week.
To help your pumpkin stay fresh, keep it in a cool location when possible and avoid prolonged exposure to direct sunlight or excessive heat.
Remove as much pulp as possible during carving, and gently dry the inside with paper towels.
Check your pumpkin regularly for soft spots, mold, or unpleasant odors. Discard it when it begins to deteriorate.
If you want your pumpkins to look their best on Halloween night, consider carving them only a day or two before your main celebration.
Frequently Asked Questions About Easy Pumpkin Carving Ideas
What is the easiest pumpkin carving design for beginners?
A classic jack-o’-lantern with triangle eyes and a wide smiling mouth is one of the easiest designs for beginners. The shapes are simple to draw and carve, and the finished pumpkin looks festive when illuminated.
How can I make pumpkin carving designs look more impressive?
Choose bold shapes, keep the carving edges clean, and use warm LED lighting inside the pumpkin. Displaying your carved pumpkin alongside smaller uncarved pumpkins and simple autumn decorations can also make the finished arrangement look more attractive.
Can I carve a pumpkin without artistic skills?
Yes! You can use printed stencils to trace simple designs onto your pumpkin. Stars, crescent moons, ghost outlines, and basic Halloween faces are good options because they rely on recognizable shapes rather than detailed artwork.
What tools do I need for easy pumpkin carving?
A basic pumpkin carving kit, washable marker, pumpkin scoop, and printed stencil are usually enough. Use a stable work surface and appropriate carving tools, and supervise children carefully.
Should I carve my pumpkin from the top or bottom?
Both methods can work. Cutting a lid around the stem is a familiar approach, while some people prefer creating an opening in the bottom. Whichever method you choose, follow the instructions for your carving tools and maintain control of the pumpkin while cutting.
How do I light a carved pumpkin safely?
Use a battery-operated LED candle or another light specifically designed for pumpkin displays. Avoid open flames, especially when pumpkins are surrounded by dried leaves, fabric decorations, or other flammable materials.
Can kids make these pumpkin carving designs?
Children can help choose pumpkins, draw faces, and trace stencils. Adults should handle sharp cutting tools, while younger children can participate in safer tasks such as decorating the display and placing battery-operated lights inside finished pumpkins.
Final Thoughts on Easy Pumpkin Carving Ideas
Creating beautiful Halloween pumpkins doesn’t have to be complicated or time-consuming.
With a few basic tools and simple designs, you can carve pumpkins that look fun, creative, and impressive without needing professional artistic skills.
Whether you choose a cheerful jack-o’-lantern, a cute ghost, a spooky cat, or an elegant moon-and-stars pattern, each of these 7 easy pumpkin carving ideas offers a beginner-friendly way to celebrate Halloween.
The secret is choosing bold shapes, using simple stencils, and taking your time with the cuts.
Once your pumpkins are finished, add warm LED lights and arrange them on your front porch, steps, or outdoor table.
You’ll have a beautiful Halloween display that looks amazing during the day and even better after dark.
Save these easy pumpkin carving ideas to your Pinterest Halloween board so you can find your favorite designs when it’s time to start carving!